

I'll walk you through the entire process of installing and setting up PostgreSQL on WSL, so you'll have a handy guide when you decide to get the PostgreSQL expansion bundle for PackageJS. We'll cover everything step-by-step: starting from the installation, connecting to PostgreSQL using psql, creating a new role, adding a password to it, creating a new database, and even working with tables by creating and deleting them. Additionally, I'll share the common errors I encountered while learning this process myself. So, get ready to dive in and master PostgreSQL setup and usage in no time!
INSTALLATION
At first, I thought of installing the database for Windows, but then it occurred to me that I use PackageJS in WSL. If you're curious about setting up PackageJS in WSL (Windows Subsystem for Linux), check out this detailed guide I've published on my blog: PackageJS: How to set up on Windows 10 Pro (WSL)
There would be no need for that Windows version installation, I did a little googling and found the commands to run in WSL and get PostgreSQL installed:
Update your WSL package lists by running:
sudo apt update
Install PostgreSQL along with some additional useful features using:
sudo apt install postgresql postgresql-contrib
Once the installation is complete, you can start the PostgreSQL service with the following command:
sudo systemctl start postgresql.service
Connecting to PostgreSQL (psql)
I found out that the installation procedure created a user account called 'postgres' that is associated with the default Postgres role. There are a few ways to utilize this account to access Postgres. One way is to switch over to the 'postgres' account on your server by running the following command: sudo -i -u postgres. Then you can access the Postgres prompt by running: psql.

This logs you into the PostgreSQL prompt, and from there you are free to interact with the database management system right away.
In order to exit the PostgreSQL prompt, you can use the command postgres=# \q. This will take you back to the Linux command prompt. To return to your regular system user, simply run the exit command.

Alternatively, you can connect directly to the Postgres prompt as the postgres account using the psql command with sudo. Here's how you can do it: $ sudo -u postgres psql. This method eliminates the need for an intermediary bash shell, providing a direct connection to Postgres. To exit the interactive Postgres session in this mode, just type postgres=# \q.
Now, when it comes to creating a new role, if you give the role the same name as your Linux user, there's no need to use the command $ sudo -i -u joseph. Instead, you can directly use $ sudo -u joseph psql or simply psql assuming that "joseph" is the name of your Linux profile.
This way, you'll be seamlessly connected to the interactive Postgres session without any extra steps. Keep in mind that we'll cover the process of creating a new role in more detail below.
Creating a New Role
If you are currently logged in as the 'postgres' account, you have two options for creating a new user role. The first one is to simply run the command createuser --interactive from the terminal. This will guide you through a series of prompts to set up the user according to your preferences.
Alternatively, if you'd rather not switch to the 'postgres' account, you can use sudo along with the -u postgres option before the createuser --interactive command. This will allow you to execute the necessary Postgres commands directly from your normal account but with elevated privileges.
In both cases, the script will present you with choices and handle the appropriate Postgres commands based on your responses, simplifying the process of creating a new user to match your specific requirements.
Adding a Password To The Role
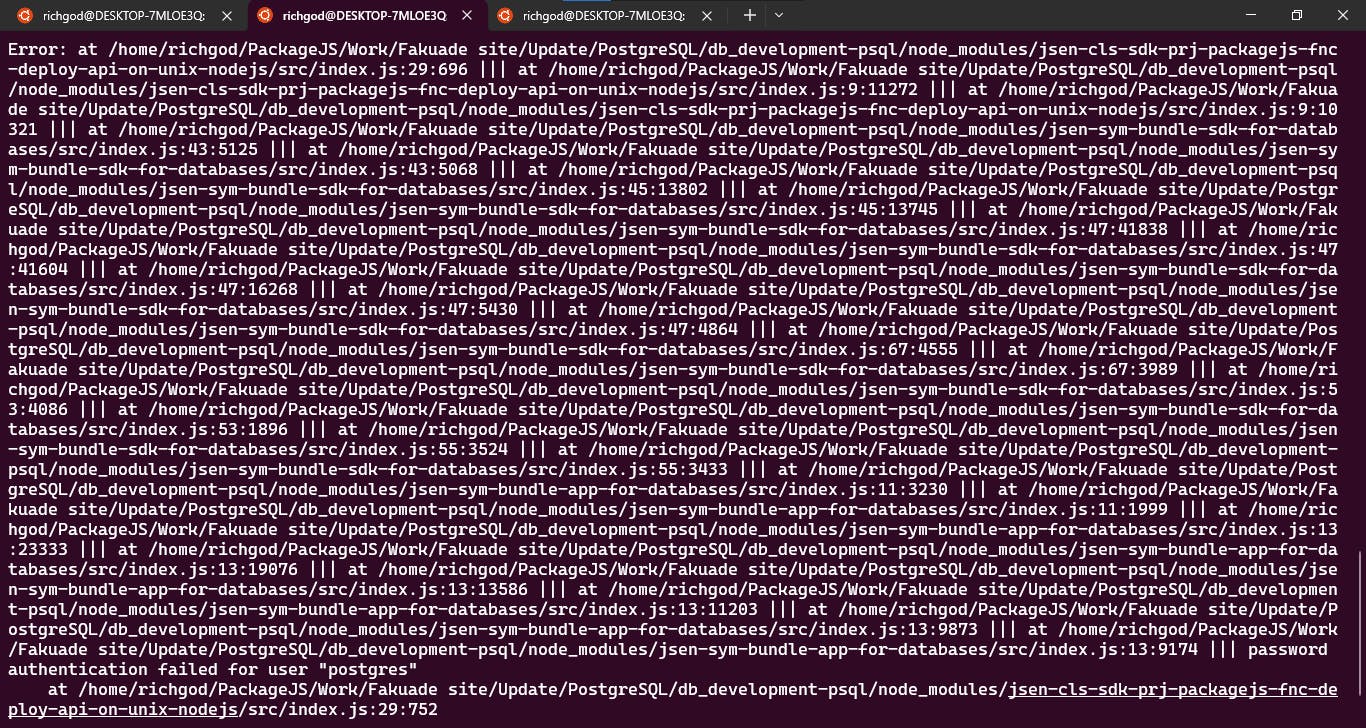
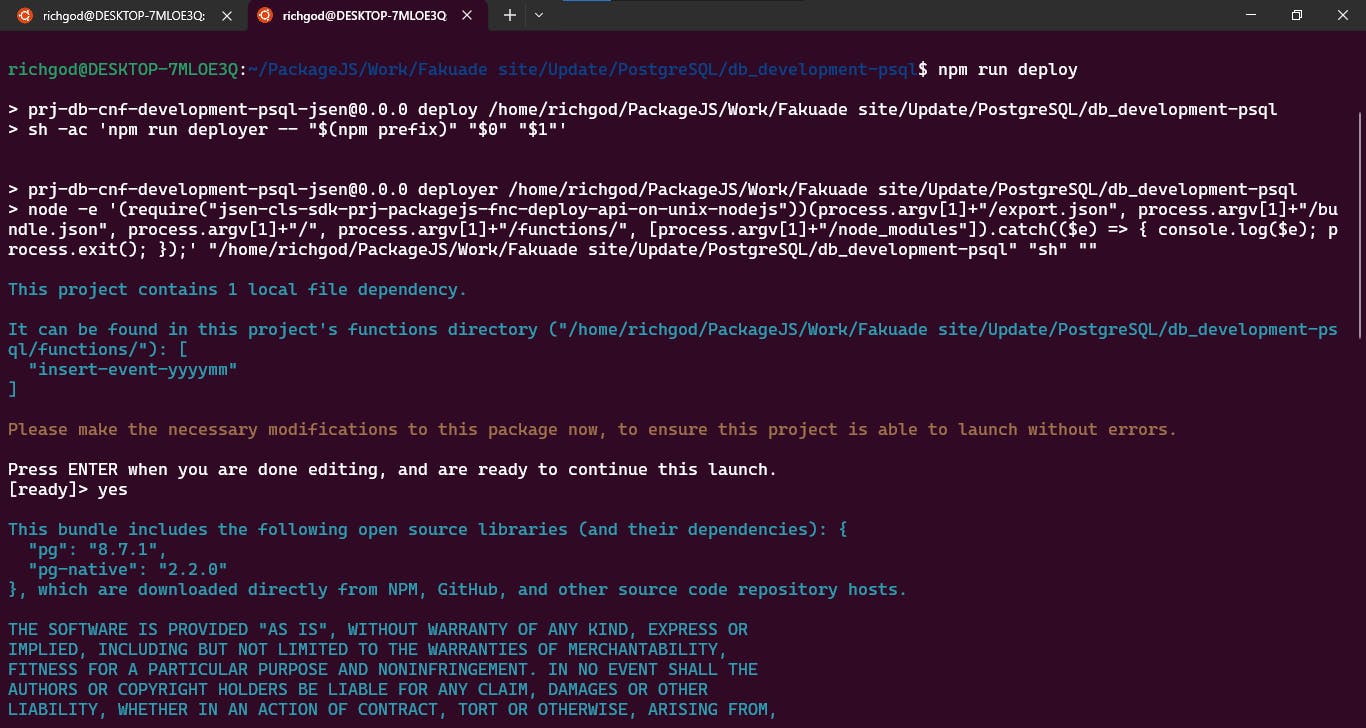
One crucial aspect to consider is that when you're setting up your API deployment and you want to execute the command npm run deploy after running npm install, you must ensure that the [DEF_POSTGRESQL_PASS]> field is not left empty. I made this mistake and ran into errors when I was giving this setup a go.
To achieve this, it's essential to set a password for the newly created role. Here's how you can do it:
Log in using the
postgresaccount.Execute the following command:
ALTER USER user_name WITH PASSWORD 'new_password';
In this command, replace user_name with your current role's username, which should be postgres. Similarly, replace new_password with the password you desire. Remember, the user_name can be anything you want it to be, just remember it when you need it though, the same thing goes for your new_password.
By following these steps, you'll ensure that your deployment runs smoothly without any issues related to the PostgreSQL password.
Creating a New Database
By default, the Postgres authentication system assumes that any role used for login should have access to a database with the same name as the role itself. Don't be surprised if this happens; it's a normal behavior, I was confused as well when I noticed it.
For instance, if you create a user called "joseph," that user will automatically try to connect to a database named "joseph." To ensure the appropriate database is available, you can create it using the createdb command.
If you're currently logged in as the "postgres" account, you can execute: postgres@server:-$ createdb joseph. Alternatively, if you prefer using sudo for each command without switching from your normal account, you can use: $ sudo -u postgres createdb joseph.
In case you want your user to connect to a different database, you can specify it like this: $ psql -d postgres.
By understanding these concepts and following the steps, you'll be able to manage database access effectively and make the most out of your Postgres setup.
Creating and Deleting Tables
Now that you've learned how to connect to the PostgreSQL database system, let's explore the process of creating and deleting tables.
When creating a table in PostgreSQL, the basic syntax is as follows:
CREATE TABLE table_name (
    column_name1 col_type (field_length) column_constraints,
    column_name2 col_type (field_length),
    column_name3 col_type (field_length)
);
However, to actually create a table with specific attributes, you would use a command like this:
joseph=# CREATE TABLE classroom (
joseph=# equip_id serial PRIMARY KEY,
joseph=# type varchar (50) NOT NULL,
joseph=# color varchar (25) NOT NULL,
joseph=# location varchar(25) check (location in ('north', 'south', 'west', 'east', 'northeast', 'southeast', 'southwest', 'northwest')),
joseph=# install_date date
joseph=# );
It's tricky at first but just have it in mind that clicking enter does not terminate the command, it just takes you to the next line and you can continue typing.
This command creates a table for managing classroom equipment inventory. The first column, equip_id, is of the serial type, which automatically increments an integer value. This column is also designated as the PRIMARY KEY, ensuring unique and non-null values.
Following that, we have columns for equipment type and color, both set to varchar data type with maximum lengths specified (50 and 25, respectively). These columns are also constrained as NOT NULL, meaning they must have values.
The location column comes next, which is a varchar field limited to 25 characters. It has a constraint check that limits its values to eight specific options - 'north', 'south', 'west', 'east', 'northeast', 'southeast', 'southwest', and 'northwest'.
Finally, the last column is install_date, which is of the date data type used to record the equipment installation date.
For some columns (like equip_id and install_date), we don't specify a field length because certain data types don't require a fixed length or format.
To delete a table, it's as simple as running the following command:
joseph=# DROP TABLE table_name;
Replace table_name with the name of the table you want to delete.
By following these steps, you can efficiently manage your PostgreSQL database by creating and removing tables as needed.
Connecting To PostgreSQL From Node (pg pg-native)
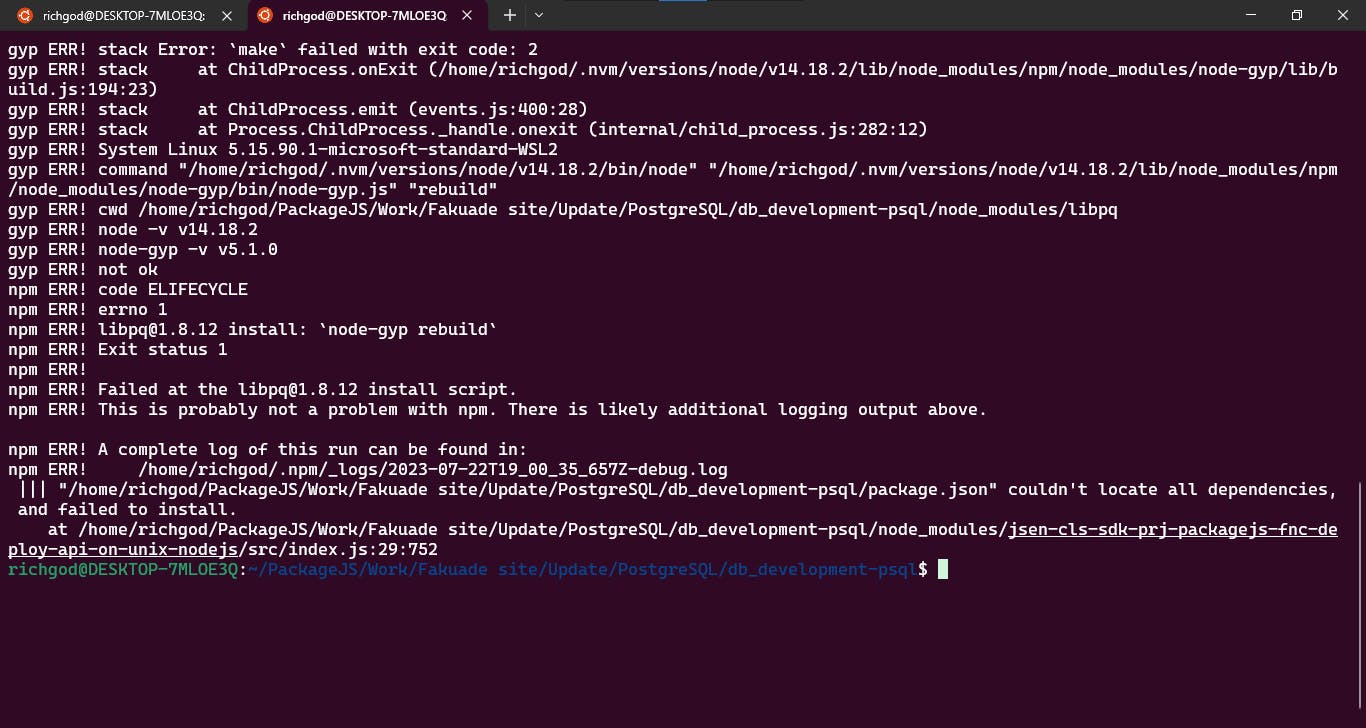
When I first set up my deployment from the starter kit dashboard, I encountered some errors when I tried running npm run deploy after performing the necessary npm install.
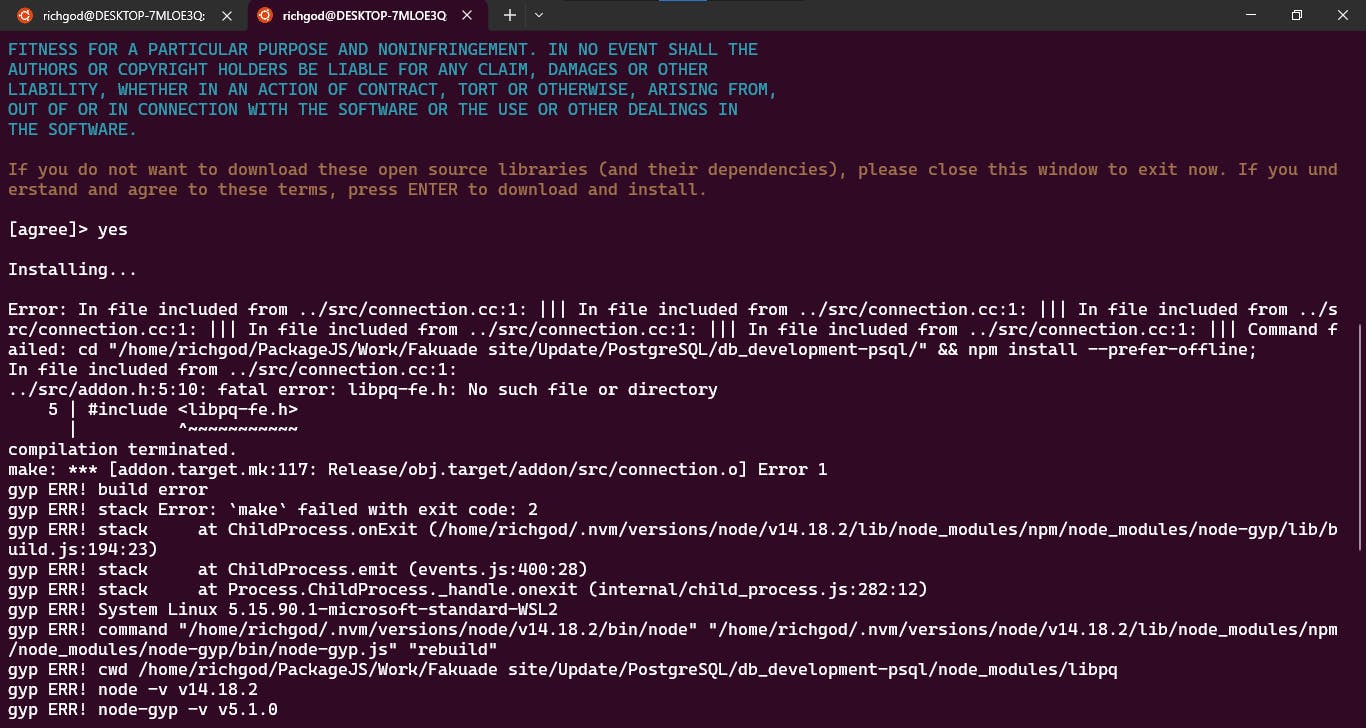
After searching for solutions online, I found a command that proved helpful: sudo npm install -g node-gyp. This command installs node-gyp, which is a valuable build tool for Node.js. It allows Node.js applications to use native add-ons written in languages like C and C++.
With node-gyp installed, the next step was to run apt-get install libpq-dev g++ make. This installation includes the libpq-dev package, containing crucial development and header files required for compiling programs that interact with a PostgreSQL database. It also installs the GNU Compiler Collection for C++ (g++) and the build automation tool (make). Together, these components are necessary for successfully building and compiling C++ programs that interact with PostgreSQL databases.
After installing these components, I restarted my PC to ensure the changes took effect. Once my system was up and running, I opened the terminal in WSL (Windows Subsystem for Linux) and created a random directory. Inside that directory, I ran the command npm install pg pg-native. pg refers to the node-postgres library, and pg-native is a support library for PostgreSQL in Node.js.
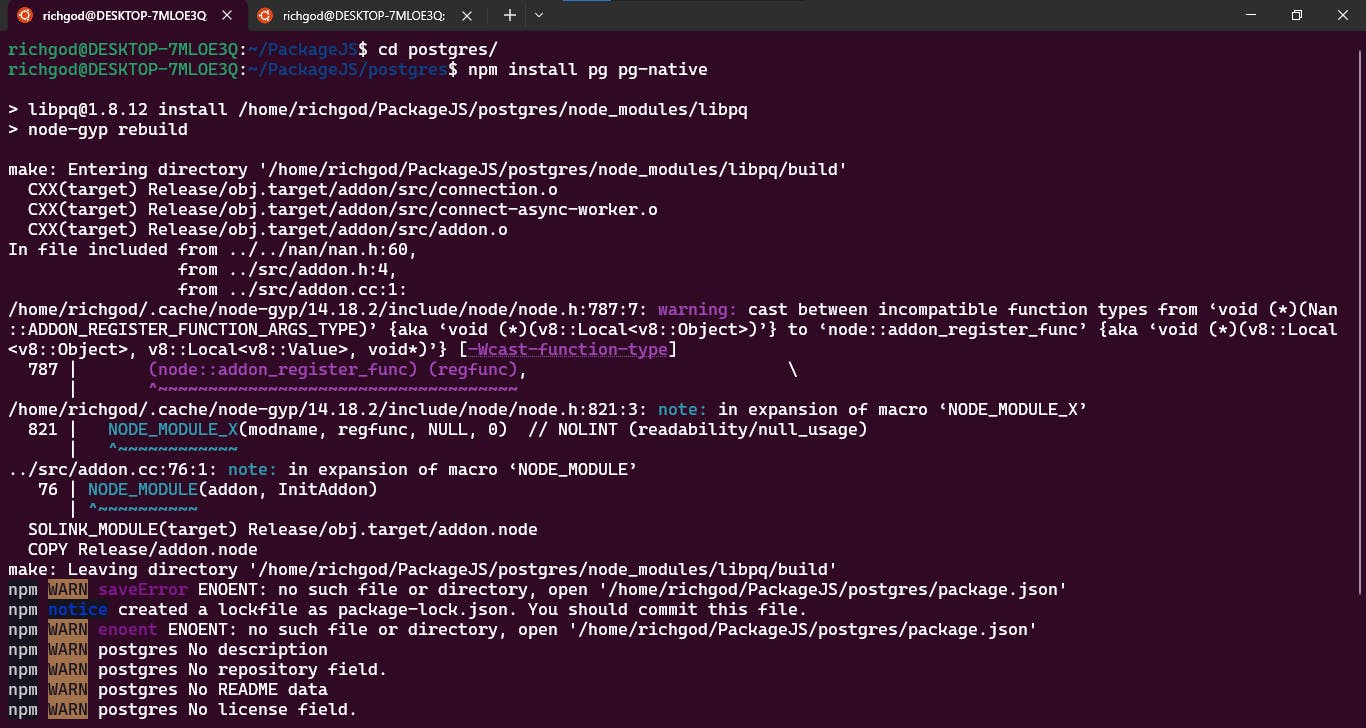
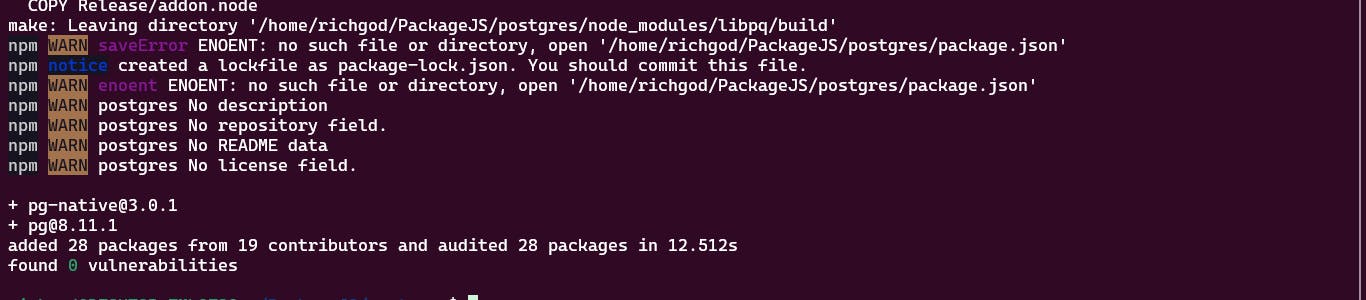
If you encounter any further errors after running this command, it indicates that there might still be an underlying problem. However, if there are no errors, it means everything is set up correctly, and you can confidently run npm install in your newly created API deployment without issues.
Remember, to avoid errors when running npm run deploy, make sure not to leave the [DEF_POSTGRESQL_PASS]> field in the environment variables blank. Additionally, enable LOG_QUERIES by changing the value from 0 to 1.

Doing so allows you to view the actual queries printed to the console, which can be useful for debugging and monitoring your application.
Conclusion
If you want to discover how to make the most of PostgreSQL in conjunction with PackageJS, there's a series of informative tutorial videos waiting for you on the PackageJS YouTube channel: [WAB v1 | PostgreSQL, React.js] Getting Started (packagejs.com). These tutorials will help you grasp the ins and outs of using PostgreSQL effectively with PackageJS.
I hope you found this helpful and I'll catch you in the next one!