

Hi there! In part 1, we successfully built and launched our API, this time I'll guide you on how you're going to automatically generate and customize your user interface via yours truly PackageJS. You've already had a glance at what the interface of the dashboard looks like, so I will not make use of as many images as I did in part 1. Without any delay, let's get to it!
Generating your UI
After launching your reactjs starter kit and opening the URL http://localhost:40082 in your browser to view the dashboard. You'll click on Interfaces and click the plus sign.

You'll then name your new UI "to do app interface" or anything you like. Once that's taken care of, you'll connect your UI to your API by clicking on the plus sign you see here:

Connecting the UI to your API
The API was launched on http://127.0.0.1:49000 and its contract can be accessed when you add /openapi.json making the entire URL http://127.0.0.1:49000/openapi.json . Be sure to copy the contract, you'll need it to complete this step.
Clicking on that plus sign takes you to this page where you have to set the "Remote API name..." to "tasks" and pasting the contract in the text area that reads "Remote contract (JSON)..." and click "Insert" .
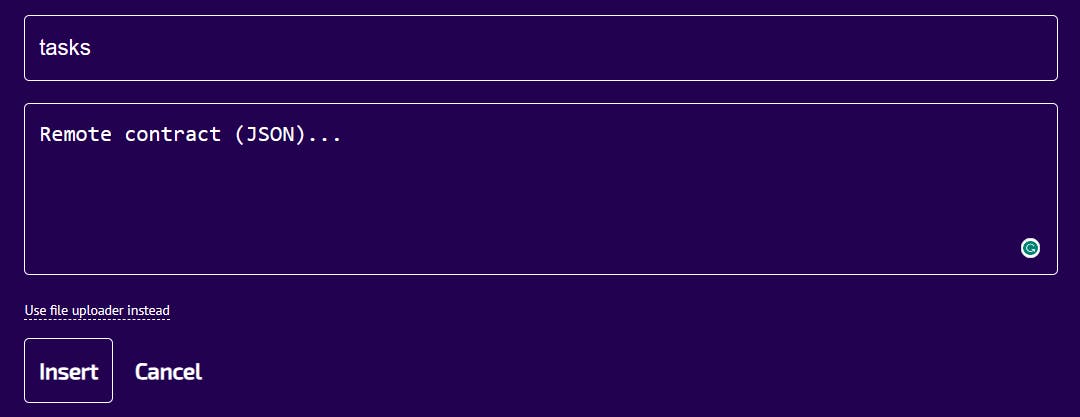

If you receive the warning "Failed to GET doms.remote_contract" then you pasted in the URL to the contract. You must paste in the actual body of the JSON contract itself.
Deploying the UI
You should still remember the procedure to deploy, it's pretty much the same thing here, just that it's for the UI. The name you'll set is still "development" or any name you decide to call it and select what "Bundle type" you want to make use of, then click "Insert".

You can choose other bundle versions, but this one is the default and automatically updates when new versions are released. The versioned (-v1) bundles are locked to the specific bundle versions. You can now proceed to deploy the current version of the UI, just as you deployed the API.
Launching the UI
Navigate to your downloads folder, and unzip the "to-do-application-interface_development.zip" file. Then open that directory in your Windows Subsystem for Linux terminal as you did for the starter kit and make sure you are using Node version 14 or higher.
Check the README.md file and you'll see instructions to run npm install to install all packages for your project. Press Enter and wait for them to install, then run npm run deploy to deploy your application.
Now, you'll be asked to set your environment variables, it's best to use the default values. Setting [DEF_UI_URL]> to pretty much any port between 20000 and 60000, but I use http://127.0.0.1:9000 and that's the URL your UI will launch on. And we will set [DEF_SERVICES_URL_FOR_APIS_REMOTE_TASKS]> to the URL we launched our API, which is http://127.0.0.1:49000/openapi.json . After that, you can press enter until you see this:

And your UI will open up in your browser automatically!

Conclusion
Congratulations! You've built your to-do app!
In the next blog, I'll be providing a step-by-step tutorial on how to set up and use TailwindCSS to style this to-do app so it looks much better.
I hope you found this helpful, I'll catch you in the next one!